How to Tell Where a Leak in Your Building Project Is Coming From

Water leaks in building projects can be a nightmare—especially if they go unnoticed or untreated for too long. Whether you’re working on a residential renovation or a large commercial structure, identifying the source of a leak quickly is crucial to avoid structural damage, mold growth, and costly repairs. The challenge lies in the fact that water can travel far from its source, making it tricky to detect where it’s actually coming from.
This article will walk you through the step-by-step process of diagnosing leaks in your building project, including what to look for, how to isolate the source, and when to call in the pros.
Why Leaks Are So Hard to Trace
One of the reasons leaks are so difficult to locate is that water doesn’t always follow a straight path. Due to gravity and the nature of building materials, a leak might appear in one place but originate from somewhere completely different. For example, water might seep through a roof, run down a rafter or pipe, and only show up as a stain on a ceiling tile several feet away.
Moreover, modern building projects use a complex mix of plumbing, HVAC, and structural systems—all of which can develop leaks independently or in combination with one another.
Signs You May Have a Leak
Before identifying the source, it’s important to confirm that a leak is indeed the problem. Here are some common indicators:
- Water stains on ceilings, walls, or floors
- Peeling paint or bubbling wallpaper
- Unusual dampness or puddling
- Musty or moldy odors
- A sudden spike in water bills
- Sounds of dripping or running water when all fixtures are off
These signs typically suggest that water is infiltrating where it shouldn’t be, and further investigation is needed.
Step 1: Identify the Type of Leak
There are generally four main types of leaks in building projects:
- Plumbing leaks – These originate from water supply or waste pipes. Common causes include broken joints, loose fittings, or cracked pipes.
- Roof leaks – Typically caused by damaged shingles, clogged gutters, or poor flashing around vents and chimneys.
- Window and door leaks – These are usually due to poor sealing or caulking, allowing rain to seep in.
- Foundation leaks – Caused by poor drainage, hydrostatic pressure, or cracks in the concrete foundation.
By identifying which type of leak you’re dealing with, you can narrow down your troubleshooting efforts.
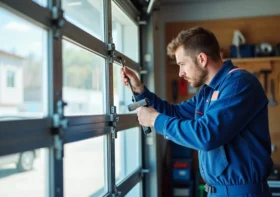
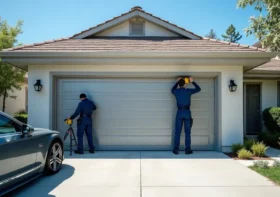
Step 2: Use Visual Inspection
Start with a thorough visual inspection of the affected area:
- Look above the damage: Water flows downward due to gravity, so always inspect above the area of visible damage.
- Check joints and connections: In plumbing systems, joints and connections are common points of failure.
- Inspect exterior features: If the leak appears near a window or exterior wall, check flashing, sealants, and caulking.
- Examine the roof: Look for cracked shingles, damaged flashing, or clogged gutters if the leak appears on the top floor or ceiling.
Using a flashlight and mirror can help inspect tight or dark areas like under sinks or behind wall cavities.
Step 3: Use Moisture Meters or Infrared Cameras
If visual inspection isn’t enough, it’s time to bring out some tools:
- Moisture meters measure the moisture level in walls and ceilings and can help pinpoint the source.
- Infrared cameras detect temperature variations and are excellent for identifying cold, damp areas hidden behind surfaces.
These tools can be invaluable in larger building projects or when the leak is inside a wall, ceiling, or floor.
Step 4: Isolate the Leak
To isolate the leak, try turning off water supply lines one at a time and observing if the leak slows down or stops. This is especially useful for suspected plumbing leaks.
In the case of roof or exterior leaks, simulate rain by spraying water on specific areas using a garden hose. Have someone inside observe for signs of water entry. Start from the bottom and work your way up slowly to avoid false positives.
For drainage or foundation leaks, monitor after heavy rain or use a water pressure test on exterior walls.
Step 5: Check for Hidden Damage
Sometimes, leaks go unnoticed for extended periods and cause hidden damage. This could include:
- Mold growth inside walls
- Rotted wood framing
- Damaged insulation
- Corrosion on metal parts
Consider removing drywall or ceiling tiles in localized areas to confirm the full extent of the damage before sealing it back up.
When to Call the Professionals
While some leaks can be managed with DIY fixes, more complicated or widespread leaks require professional expertise. If you’re dealing with persistent or recurring issues, hiring licensed plumbers, roofers, or waterproofing specialists can save time and prevent future problems.
If you’re in the Marietta area and need emergency help, consider reaching out to 24/7 plumbing services Marietta for fast, professional assistance. Their team specializes in rapid response and can handle leaks of any size or complexity.
Preventing Future Leaks
Once you’ve solved the current problem, take steps to ensure it doesn’t happen again. Here are some tips:
- Perform regular inspections of your plumbing, roofing, and waterproofing systems.
- Install water leak detectors that can alert you when moisture is detected in vulnerable areas.
- Keep gutters and downspouts clear to prevent water from backing up onto your roof or foundation.
- Use high-quality sealants and waterproof materials during construction.
- Insulate pipes to prevent freezing and bursting in colder climates.
Prevention is always cheaper and easier than repair.
Summing It All Up
Leaks can be elusive and damaging, but with a systematic approach, you can identify their source and stop them before they escalate. Start with a visual inspection, use the right tools to trace hidden moisture, and don’t hesitate to call in professionals when needed.
Whether it’s a dripping pipe inside a wall or a roof that’s letting in rainwater, every leak has a cause—and finding it is the first step to fixing it. With careful attention and a proactive mindset, you can protect your building project from unnecessary water damage and ensure its long-term integrity.