How to Build a Deck: A Comprehensive DIY Guide
Whether you’re looking to expand your outdoor living space, increase the value of your home, or simply create a spot to relax and entertain, building a deck is a rewarding and achievable project for many homeowners. If you’ve ever wondered how to build a deck, this guide will walk you through every step—from planning and design to construction and finishing touches. With some preparation, the right tools, and a bit of patience, your deck dreams can become a reality.
For homeowners who plan to do the welding work themselves, it’s important to use clear, protective welding lenses for better visibility and eye safety. High-quality lenses protect your eyes from bright sparks, while giving you a clear view as you work on metal posts or framing components.
Contents
Step 1: Planning Your Deck
Before you grab a hammer or buy a single piece of wood, the first and most important step is planning.
Purpose and Functionality
Ask yourself:
- What will I use the deck for? Dining? Lounging? Hosting guests?
- How many people should it accommodate?
- Will it be attached to the house or freestanding?
Size and Shape
Measure your space carefully. Consider how the deck will affect your yard, any existing landscaping, and sight lines from inside your home.
Orientation and Sunlight
Decks facing south get more sun; north-facing decks stay cooler. Think about how the sun moves over your property and whether you’ll need shade.
Budget
Your budget will dictate materials, size, and features. Building a basic 10×10 deck might cost $1,500–$3,000 for DIYers, while larger or multi-level decks could cost much more.
Step 2: Choosing Materials
Deck materials affect durability, maintenance, and aesthetics.
Wood
- Pressure-treated lumber – Affordable, widely available, and treated to resist rot and insects.
- Cedar or redwood – Naturally resistant to decay but more expensive.
- Ipe or mahogany – Premium hardwoods that offer high durability.
Composite Decking
- Made from plastic and wood fibers.
- Resistant to rot, warping, and insects.
- Low maintenance but typically more expensive.
Fasteners and Hardware
- Use galvanized or stainless-steel nails/screws to prevent rust.
- Hidden fasteners provide a cleaner look.
Step 3: Getting Permits and Understanding Local Codes
Before breaking ground:
- Check with your local building department. Many areas require permits for decks above a certain height.
- Ensure you understand zoning laws, setbacks, and safety codes, such as railing heights and stair dimensions.
- Schedule any required inspections early to avoid project delays.
Step 4: Preparing the Site
Once plans are finalized and permits secured, you’re ready to prepare the construction site.
Mark the Area
- Use stakes and string to outline the deck footprint.
- Double-check measurements and squareness using the 3-4-5 triangle method.
Clear the Ground
- Remove grass, rocks, and debris.
- For ground-level decks, consider adding a weed barrier and gravel to prevent vegetation.
Step 5: Building the Foundation
The foundation supports your deck, so it must be strong and stable.
Footings
- Dig holes below the frost line (depth varies by region).
- Use a post-hole digger or auger.
- Place concrete footings with anchor brackets embedded at the top.
Posts
- Use pressure-treated 4×4 or 6×6 posts.
- Secure them vertically in the brackets with galvanized hardware.
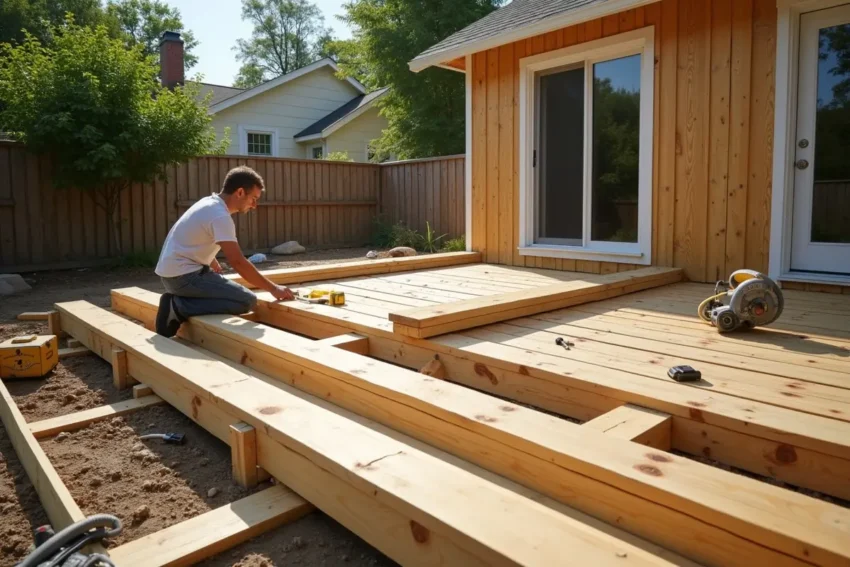
Step 6: Installing the Frame
The frame is the skeleton of your deck and must be level and square.
Ledger Board (if attached to the house)
- Securely fasten the ledger to your house using lag bolts and flashing to prevent water damage.
- Check that it is level.
Beams and Joists
- Install beams across the posts.
- Lay joists perpendicular to the beams at 16″ on center (OC) spacing.
- Use joist hangers and hurricane ties to add structural support.
Blocking
- Add blocking between joists to prevent twisting and add rigidity.
Step 7: Laying Decking Boards
Now comes the fun part: laying the surface of your deck.
Orientation
- Decide if boards will run parallel or perpendicular to your house.
- Start from the outer edge and work inward for best visual effect.
Installation Tips
- Leave a small gap (⅛” to ¼”) between boards for drainage and expansion.
- Use spacers for consistency.
- Screw or nail boards to joists, or use hidden fasteners for a cleaner look.
Step 8: Adding Railings and Stairs
These are essential for safety and style.
Railings
- Required for decks over 30″ above ground (check your local codes).
- Can be wood, metal, glass, or composite.
- Common design includes posts, top and bottom rails, and balusters spaced no more than 4″ apart.
Stairs
- Use stair stringers to support the steps.
- Each step should be equal in rise and run for safety.
- Install a handrail if required.
Step 9: Finishing and Sealing
Your deck may be built, but it’s not finished yet.
Sanding
- Sand any rough edges or surfaces.
- Pay attention to the ends of boards and corners.
Sealing and Staining
- Apply a deck sealer or stain to protect wood from UV rays and moisture.
- Composite decks don’t need sealing but can benefit from cleaning.
Curing Time
- Wait 24–48 hours after sealing before using the deck, depending on the product used.
Maintenance Tips
Even the best-built decks need regular care:
- Sweep frequently to prevent debris buildup.
- Wash annually using a deck cleaner and scrub brush or power washer.
- Re-seal or stain wood decks every 2–3 years.
- Inspect for loose boards, protruding nails, and signs of rot or damage.
Common Mistakes to Avoid
Learning how to build a deck means learning what not to do:
- Skipping permits or inspections: Can result in fines or unsafe structures.
- Improper ledger attachment: Can lead to deck collapse.
- Not accounting for drainage: Water buildup shortens your deck’s lifespan.
- Poor spacing between boards: Leads to warping and pooling water.
- Inadequate foundation: Your entire structure depends on this.
Final Thoughts
Now that you know how to build a deck, you’re equipped with the knowledge to plan, construct, and maintain a safe, stylish, and durable outdoor structure. It’s a project that requires attention to detail, adherence to building codes, and respect for your budget—but the rewards are worth it.
From the first sketch on paper to the first BBQ on your new deck, every step contributes to a space that brings family and friends together for years to come. Whether you choose wood for its classic charm or composite for its modern convenience, building a deck is one of the most satisfying home improvements you can tackle.